Showing posts with label breakfast. Show all posts

Thursday, February 17, 2011

Fluffy Waffles with Banana Foster Sauce

I LOVE breakfast foods... at breakfast, brunch, lunch or dinner! This made a wonderful breakfast for dinner meal. The waffles were extremely light, with just the right amount of sweetness. And the sauce was delicious! I've made it a couple times in the past, and each time it reminds me of this quaint B&B my husband & I stayed at 4 or 5 Christmases ago. A similar sauce was served with granola & nuts, and while my husband didn't like it, I eagerly ate both of our servings!

Both components are easy to make, making it a great weeknight meal, or a special treat on the weekend mornings (without having to do any preparation the night before or wonder if you have buttermilk in the fridge).


FLUFFY WAFFLES (Adapted from All Recipes)
Feeds 2-4 people

2 eggs
2 tablespoons white sugar
3 tablespoons melted butter
1 3/4 cups milk (I used soy milk)
1 teaspoon salt
1 teaspoon vanilla extract
1 1/2 cups all-purpose flour
1 tablespoon baking powder

Preheat a waffle iron.

Beat together eggs and sugar. Pour in butter, milk, salt, and vanilla; mix until well blended. Sift together the flour and baking powder. Mix the flour into the liquid.

Spoon 2/3 cup of batter onto the preheated waffle iron at a time. Close the iron and cook until steam no is no longer coming out and waffle is browned.

BANANA FOSTER SAUCE
Makes enough for topping 1 large waffle

1 banana, sliced
1 tablespoon butter
1 tablespoon dark brown sugar

Place all ingredients in a small saucepan. Heat over medium heat, stirring occasionally, until bubbling. Serve warm over fresh waffles.

ENJOY!

Sunday, February 6, 2011

Chocolate Chip Pancakes

When I was young, we would often make long trips to see my grandparents on the weekends (depending on where we lived at the time, it may have been up to 10 hours!) In late elementary, we lived about 4 hours away from my grandparents. Half way there, we would pass through a town with a Perkins, where we would always have dinner. Before I learned how much I loved their Omelets with a Raspberry & Cream muffin on the side, I was dedicated to my chocolate chip bear pancakes.

I rarely make chocolate chip pancakes, as they seem a little bit too much like dessert for my husband (although I LOVE having chocolate for breakfast). These brought back fond memories of my trips to Grandpa & Grandma's house, even though I didn't shape them into a bear.


CHOCOLATE CHIP PANCAKES (Adapted from All Recipes)

2 cups all-purpose flour
1/4 cup sugar
2 tablespoons baking powder
1 teaspoon salt
2 eggs
1 1/2 cups soy milk
1/4 cup vegetable oil
1 teaspoon vanilla
1/2 cup miniature chocolate chips

In a bowl, combine the flour, sugar, baking powder and salt. Combine eggs, milk, vanilla and oil; add to dry ingredients and mix well. Stir in chocolate chips. Pour the batter by 1/4 cupfuls onto a lightly greased hot griddle. Turn when bubbles form on top; cook until second side is golden brown. Keep warm.

ENJOY!

This recipe participated in Sweets for a Saturday

Saturday, December 18, 2010

Lemon Cranberry Muffins

With a few left over cranberries in the fridge during the holiday season, I wanted to find a way to incorporate them into a warm winter breakfast. I knew waffles would be a no-go (My blueberry waffles turned out wonderfully this summer, but whole fruits/berries in Belgium waffle makers makes a mess, and the waffles are difficult to get out). My next thought was muffins, and I had everything I needed to make them.

The lemon & cranberry combination works well together in these muffins. The cranberries are quite tart, but the muffin itself is just sweet enough to counteract the tartness. They store well in a tupperware for a couple days, making them a great Sunday breakfast, with leftovers to eat the next few mornings. (And they're easy to bring with on the commute to work when you're running behind... Not that I ever get a late start on these early, dark mornings...)


LEMON CRANBERRY MUFFINS (Adapted from Food Republik)
Makes approximately 14-16 muffins

1 - 6oz container of lemon yogurt
1 cup granulated sugar
3 large eggs
pinch salt
1 3/4 cups all-purpose flour
2 tsp baking powder
1/2 teaspoon lemon extract
1/4 cup oil
2 cups fresh cranberries

Preheat oven to 350 F. Mix the yogurt, sugar, salt, eggs and lemon extract together in a large bowl.

In a separate bowl, mix together the flour and baking powder. Add dry ingredients to wet, and stir together until moistened.

Add oil and mix until batter is smooth and homogeneous. Fold in cranberries.

Bake for 20-25 minutes until a toothpick inserted into muffins comes out clean.

ENJOY!

Sunday, November 28, 2010

Banana Pecan Waffles

If you can't tell yet, after cupcakes, breakfast is one of my favorite things to make. We occasionally find a few very ripe bananas sitting on our counter (a very rare occurrence as my husband & I both love bananas). When we do have some dark bananas, I look forward to baking with him. Banana bread used to be my "go to" recipe to utilize them, but I decided I wanted to experiment this time and found this delicious recipe. They are very hearty waffles - I couldn't even finish one entire waffle without being stuffed! They reheat wonderfully in the oven or a wide-slot toaster, making them a great breakfast for the rest of the week!


Banana-Pecan Waffles (Original source Sunset Magazine, January 2005)
Servings 8 – 10

1 1/4 cup all-purpose flour
1 tablespoon sugar
1 1/2 teaspoons baking powder
1/2 teaspoon baking soda
1/2 teaspoon ground cinnamon
1/4 teaspoon ground nutmeg
1/4 teaspoon salt

2 large eggs
3/4 cup low-fat milk
3/4 cup mashed ripe banana (approx 2 medium-large bananas)
1/2 cup sour cream
1/4 cup butter, melted
3/4 cup toasted pecans, coarsely chopped (directions follow)


In a large bowl, mix flour, sugar, baking powder, baking soda, cinnamon, nutmeg, and salt.

In another bowl, mix egg yolks, milk, banana, sour cream, and butter until well blended. Stir egg-yolk mixture into flour mixture just until combined. Stir in the toasted pecans (see below for directions).

In another large bowl, beat egg whites with an electric mixer until soft peaks form. Gently fold into batter until no white streaks remain.

Preheat a Belgian waffle iron to high. Brush both sides lightly with melted butter. When iron is ready, pour about 1/2 cup batter per 4-inch square; close iron and cook until waffle is browned, about 6-9 minutes. Remove waffle; keep warm on a baking sheet in a 200 degree oven up to 15 minutes. Repeat waffle cooking process to finish batter.

Serve warm with syrup or powdered sugar and some banana slices.

Toasting Pecans

Preheat oven to 350 degrees. Place pecans on a rimmed baking sheet and toast until golden brown, about 8-10 minutes. Remove immediately from oven and allow to cool before using.

ENJOY!

Wednesday, November 3, 2010

Apple Turnovers

I am SO glad that I finally tried to make puff pastry! After overcoming my fear of all of the layers of the pastry, I knew I would have to use some fresh apples & make turnovers. These were very quick & easy to make, and were by far the best turnovers I've ever had! They were wonderful for breakfast, but I definitely think they would make a great end to a fall meal (especially with a little vanilla bean ice cream, and maybe some caramel sauce... YUM!)

I'm sure these would be delicious with store bought puff pastry, but I really encourage you to try making your own!


(Look at all of those layers!)


APPLE TURNOVERS (Adapted from Annie's Eats)
Makes 12 turnovers

Puff Pastry

For the filling:
3 medium to large apples (I used a mixture of freshly picked apples)
2/3 cup sugar (adjust based on tartness of apples)
2 tsp. lemon juice
dash of cinnamon

For the topping:
½ cup sugar
1 tbls. ground cinnamon

Roll the dough into a 20- by 15-inch rectangle, about 1/8-inch thick. Line 2 baking sheets with parchment paper, trim and cut the dough into twelve 5-inch squares, and place 6 on each sheet. (If they aren’t all perfect squares, it is okay – you can cover it up once you fold them over.) Refrigerate the dough squares while you make the filling.

To make the filling, peel the apples and grate them on the holes of a large box grater (I used my food processor with the shredding disc.) Combine the grated apples, sugar, lemon juice and salt in a medium bowl. Remove one sheet of the dough squares from the refrigerator. Working with one square at a time, place 2 tablespoons of the apple filling (squeezed of excess liquid) in the center of the dough.


Moisten two adjoining edges of the dough square with a finger dipped in the apple liquid, then fold the top portion of dough over the bottom, making sure to overlap the bottom portion by 1/8-inch. Crimp the edges of the turnover with a fork.


Repeat with the remaining dough squares. Return the sheet of turnovers to the fridge and repeat with the second sheet of dough squares. Refrigerate the filled turnovers 30 minutes, or cover with plastic wrap and refrigerate for up to 24 hours. (I have to say that I'm pretty sure I skipped the refrigeration step)

While the turnovers are chilling, preheat the oven to 400° F. Combine the sugar and cinnamon in a small bowl and stir together until mixed well. Brush or mist the turnovers lightly with water and sprinkle evenly with the cinnamon-sugar mixture.


Bake until golden brown, 16-20 minutes, rotating the sheets front to back and top to bottom halfway through the baking time. Using a wide metal spatula, transfer the turnovers to a wire rack to cool. Serve warm or at room temperature.

ENJOY!

Friday, August 13, 2010

Blueberry Dutch Baby Pancake

After cupcakes, breakfast foods are definitely one of my favorite things to make. I could easily eat breakfast for any meal of the day. (This started at a young age with Chocolate Chip Pancakes at Perkins and Waffles with strawberries & whipped cream at home.)

I bought my cast iron pan 6 or so years ago, with intentions of making dutch babies. Can you believe that this was the first one I've made!?!? It was so incredibly easy to make - I'm sure I'll be making more now.


BLUEBERRY DUTCH BABY PANCAKE (Adapted from AllRecipes)

2 eggs
1/2 cup milk
1/2 cup sifted all-purpose flour
1 pinch ground nutmeg
1 tablespoon sugar
1-2 tablespoons butter
Blueberries
2 tablespoons confectioners' sugar for dusting


Place a 10 inch cast iron skillet inside oven and preheat oven to 475F.

In a medium bowl, beat eggs with a whisk until light. Add milk and stir. Gradually whisk in flour, nutmeg and sugar.

Remove skillet from oven and reduce oven heat to 425F. Melt butter in hot skillet so that inside of skillet is completely coated with butter. Pour all the batter in the skillet, and a handful of blueberries, and return skillet to oven.

Bake until puffed and lightly browned, about 12 minutes. Remove promptly and sprinkle with powdered sugar.

ENJOY!

Thursday, July 15, 2010

Blueberry Scones

Can you see that I'm on a bit of a blueberry kick? Blueberries have been so affordable recently that I always seem to have a fridge full of them to use.

Every recipe that I looked up last Saturday morning required ingredients that I was out of. (Even though they were "normal" ingredients like sour cream, heavy cream or buttermilk). I used the proportions I found on multiple recipes to come up with this delicious recipe.

They are not extremely sweet - they would be perfectly complemented by a simple glaze. I used the leftover blueberry syrup/sauce from last week. It was a wonderful combination!


BLUEBERRY SCONES

2 cups all-purpose flour
1/3 cup white sugar
1 tablespoon baking powder
1/4 cup butter, chilled & cut into 1/2 inch cubes
1 cup fresh blueberries
6oz container of vanilla yogurt
1 egg

Preheat oven to 375 degrees F

In the bowl of a food processor, pulse together the flour, sugar & baking powder. Add butter cubes, and pulse 8-12 times until the mixture becomes crumbled.

Add yogurt & egg, and pulse until just combined. Gently mix in blueberries in as few strokes as possible.

Divide dough in half. On lightly floured surface, shape each half into a 6-inch circle. Cut into 6 wedges.

Bake on ungreased sheet about 15-20 minutes. Serve warm!!

ENJOY!

Thursday, July 8, 2010

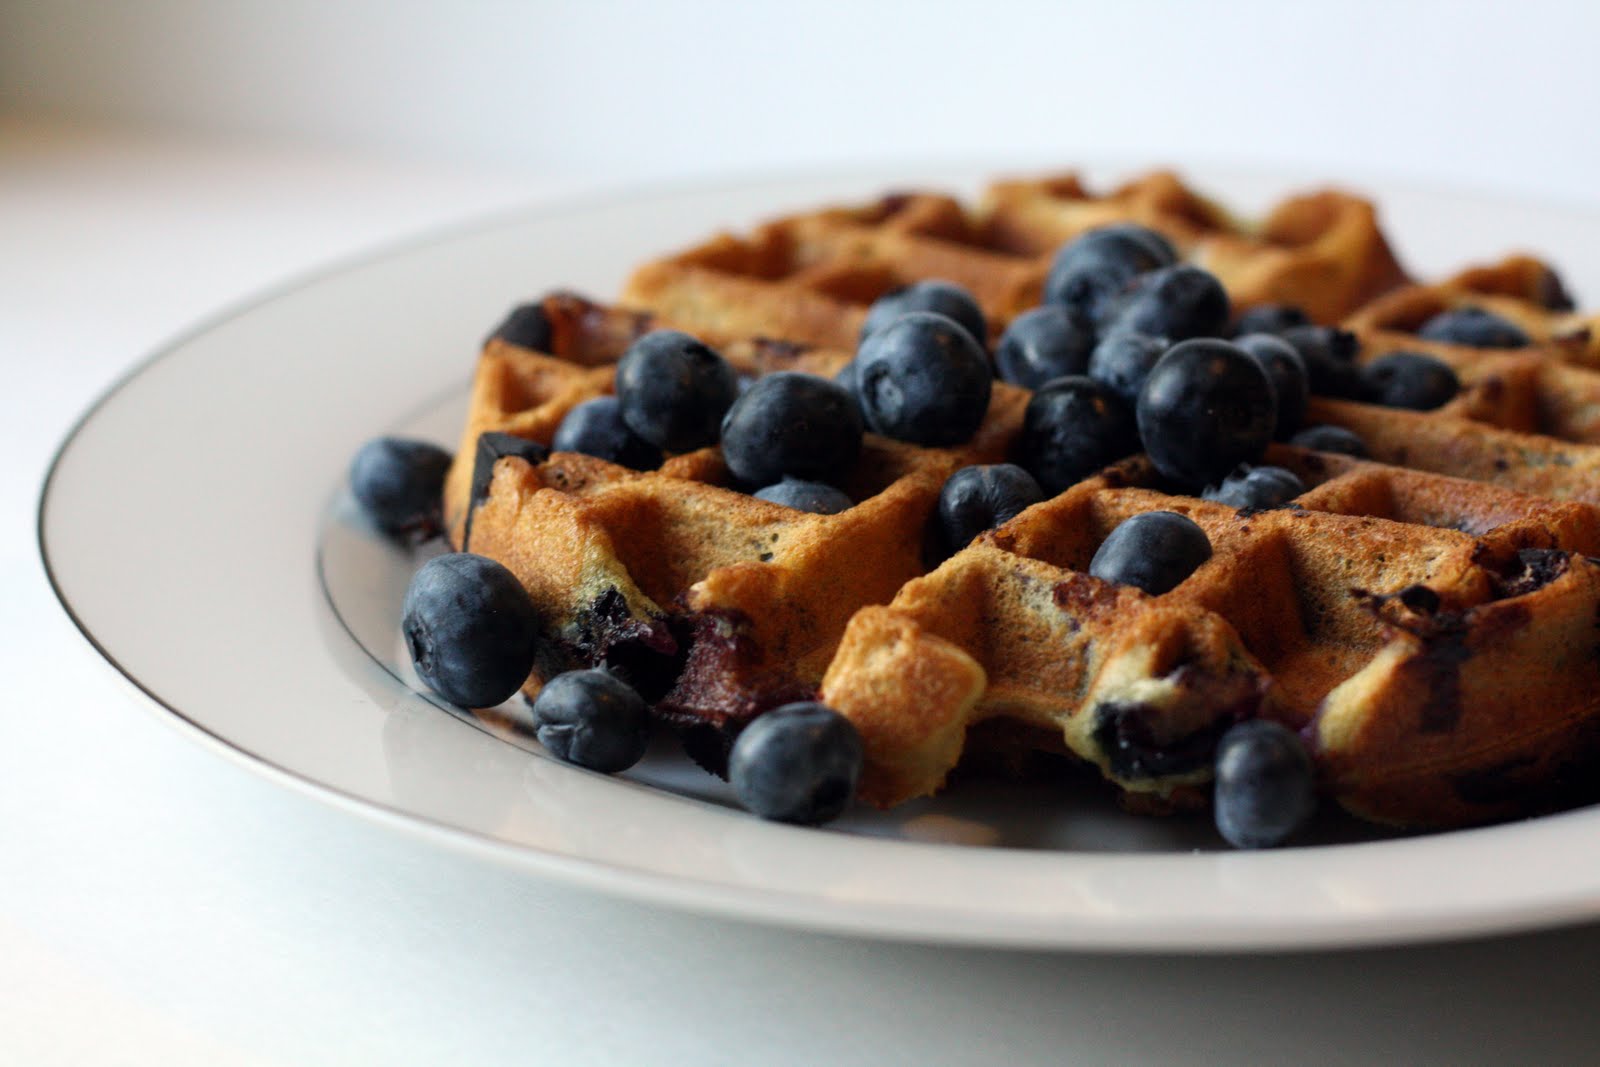
Blueberry Waffles with Fresh Blueberry Syrup

We have been eating some fantastic (& inexpensive) blueberries recently. I never ate many blueberries when I was younger, but I'm loving them now! And what a perfect fruit to incorporate into a July 4th breakfast!

These were fairly easy to whip up. However, the waffle iron was a mess afterwards from the popping blueberries while cooking. I initially had some difficulty with the waffles splitting (which I've read can happen with blueberry waffles in a belgium waffle maker), but found that if I turned the temperature down, I had less of an issue. The waffles weren't overly sweet, and were complemented nicely by a simple blueberry syrup/sauce on top.


BLUEBERRY WAFFLES (Adapted from VeganYumYum)
Made 6 large Belgium Waffles

2 Cups All Purpose Flour
2 tsp Baking Powder
1 tsp Baking Soda
1/2 tsp Salt
3 Tbs Sugar

1 (6oz) Container Blueberry Yogurt
1 1/3 Cup Milk
1/3 Cup Oil

1 Cup Fresh Blueberries
Spray Oil for the waffle iron


Preheat your waffle iron.

Mix all the dry ingredients together well with a whisk. Add the wet ingredients & whisk until combined. Gently fold in berries.

Spray your waffle iron with a little bit of oil. Follow the baking instructions for your waffle maker. (Mine has a measuring cup for the batter, and beeps when the waffles are done - I found that they needed another 1-2 minutes after my maker indicated they should be done.)


BLUEBERRY SYRUP(From A Yankee in a Southern Kitchen)

1 container fresh blueberries
1/2 cup sugar
1/4 cup water

Heat above ingredients in a small sauce-pan till bubbly and boiling, cook till it thickens slightly.

Serve warm over waffles.

(When it cools completely, it has a texture similar to cranberry sauce).

ENJOY!

Thursday, June 3, 2010

Buttermilk Pancakes

Finally another weekend off! I was able to sleep in & make a tasty breakfast. It's been awhile since I've made pancakes, and I had some left over buttermilk in the fridge from some cupcakes I made a week or 2 ago - Perfect opportunity to use it up! While they were good with syrup, I think I would have enjoyed them much more with a few chocolate chips on top, bringing me back to the days of eating chocolate chip pancakes for dinner whenever we went to Perkins to eat.


BUTTERMILK PANCAKES (Better Homes & Gardens Cookbook)
Makes 8-10 3inch pancakes

1 cup flour
1 tablespoon sugar
1 teaspoon baking powder
1/4 teaspoon baking soda
1 beaten egg
1 cup buttermilk
2 tablespoons canola oil

Combine the flour, sugar, baking powder & baking soda in a bowl. Make a well in the center, and set aside.

Combine the egg, buttermilk & oil. Add egg mixture all at once to the flour mixture. Stir just until combined (there will be small lumps remaining in the batter).

Pour or spread about 1/4 cup batter onto a 3 inch circle onto a hot, lightly greased griddle or heavy skillet (I use a large cast iron griddle on the stove, and need a medium to medium low setting on the gas).


Cook about 2 minutes on each side, or until golden brown. Turn to second side when pancakes have a bubbly surface & edges are slightly dry.

Serve immediately while warm.

ENJOY!

Friday, April 9, 2010

Simple Scones

Wow! It's been too long! I guess working nights & adding a Puggle to the family has distracted me for awhile.

These are one of my "go-to" breakfasts when we have guests. We almost always have everything we need in the house, and they are very simple to mix up. They were delicious on Easter morning served with fresh fruit, coffee & some lemon curd on the side. (And quick to make when you have a new puppy asking for some attention!)


SIMPLE SCONES (adapted from All Recipes)
Makes 12

1 cup sour cream
1 teaspoon baking soda
4 cups all-purpose flour
1 cup white sugar
2 teaspoons baking powder
1/4 teaspoon cream of tartar
1 cup butter (room temp)
1 egg
1 cup raisins/craisins/chocolate chips (flavor of your choice)

In a small bowl, blend the sour cream and baking soda, and set aside.

Preheat oven to 350 degrees F (175 degrees C). Lightly grease a large baking sheet.

In a large bowl, mix the flour, sugar, baking powder, cream of tartar, and salt. Cut in the butter. Stir the sour cream mixture and egg into the flour mixture until just moistened. Mix in the "flavor".

Turn dough out onto a lightly floured surface, and knead briefly. Roll or pat dough into a Two rounds, 3/4 - 1 inch thick. Cut each into 6 wedges, and place them 2 inches apart on the prepared baking sheet.

Bake 12 to 15 minutes in the preheated oven, until golden brown on the bottom.

Enjoy!

Monday, March 22, 2010

Easy Caramel Rolls

These have got to be one of the easiest caramel roll recipes that exists. This has been an all time favorite recipe of my family for years, and is often requested by guests. As children, some of my cousins could easily eat 4++ rolls, so make sure you make enough! They reheat wonderfully, so if you have extras, just keep them in a tupperware, and heat them up in the microwave for a few seconds - just as good as when they first came out of the oven.


EASY CARAMEL ROLLS
Makes 18 small rolls

1 pkg cook'n'serve butterscotch pudding
1 1/2 dozen Rhodes frozen dinner rolls
cinnamon
1/2 cup butter or margarine (I always use butter)
1/2 cup brown sugar
nuts (optional)

Arrange frozen rolls in a 9x13 pan sprayed with a non-stick spray. Sprinkle with dry butterscotch pudding and cinnamon. Melt butter and brown sugar in small saucepan, and bring to a boil. Pour over rolls. Sprinkle with nuts.

Allow to sit overnight (on the counter) for at least 8-9 hours to rise, longer if your home is on the cooler side.


Bake at 350 degrees for 20-25 minutes, invert onto plate or cookie sheet with an edge.


Serve by pulling apart the rolls.

(One of my favorite parts is cleaning out the caramel from the pan & off the cookie sheet!)

NOTE: Here in New England, the Rhode's Dinner Rolls - or any other frozen dough dinner roll - don't seem to exist (we called and visited multiple store before giving up). So, buy a bag of 3 loaves of bread & let them thaw just enough that you are able to cut up the dough (about 2 hours on the counter). I cut each loaf into 12 pieces - 6 slices, each cut in half. One bag then made 2 batches of caramel rolls. I double the recipe right away - I don't know that I'd try to refreeze dough that has started to thaw. Proceed with the recipe as stated above.

Enjoy!

Tuesday, March 9, 2010

Overnight Waffles

This waffle recipe has been sitting in my folder for 5 years, and I'm just now trying it out. A co-worker of mine, back when I was working on my undergraduate honor's thesis, recommended this recipe to me. He said it was one of the best recipes he's tried, and was his "go-to" recipe when guests were over. At the time, I had 4 roommates, and to be completely honest, I didn't trust a bowl full of batter sitting out on the counter when they (and all the people they had around) were in the house. So, my recipe got tucked away until now.

My husband & I finally exchanged a Christmas gift for a new Belgium waffle maker. It's one of those fancy hotel style machines that flips over. I can kind of pretend I'm on vacation while making them (except for knowing that I'm the one who has to clean up the mess). The waffle maker worked wonderfully - I would fully recommend it to anyone, and the recipe produced beautiful, light waffles. We made a double batch, and froze some of the waffles. They taste just as good after reheated in the oven for a few minutes.


(See my pretty new waffle maker in the background?)

OVERNIGHT WAFFLES ("How to Cook Everything" p745)
Makes 6-8 large round Belgium waffles

1/2 tsp instant yeast
2 cups all-purpose flour
1 tbls sugar
1/2 tsp salt
2 cups milk
1/2 cup (1 stick) butter, melted & cooled
1/2 tsp vanilla (I always add more than called for)
Canola oil for brushing on waffle iron
2 eggs

Before going to bed, combine the dry ingredients and stir in the milk, then the butter and vanilla. The mixture will be loose. Cover with plastic wrap and set aside overnight at room temperature.

In the morning, brush the waffle iron lightly with oil & preheat it. Separate the eggs and stir the yolks into the batter. Beat the whites until they hold soft peaks, then gently stir them into the batter.

Spread a ladleful or so of batter onto the waffle iron and bake until the waffle is done, usually 3-5 minutes, depending on your iron. Serve immediately or keep warm for a few minutes in a low oven.

Note: The book I got this recipe from highly recommends immediately serving the waffles as they are "delicate creatures" - keep them in a 200 degree oven for no more than 5 minutes prior to serving.

They do start to get soggy if not eaten within a few minutes. To keep them crisp prior to freezing, I put them onto cooling racks immediately until completely cool.

Enjoy!

Sunday, February 28, 2010

Coffee Cake Muffins

These were a great start to a post-call morning. They were relatively easy to make, and I had everything on hand, which is even better. They were extremely moist with the perfect amount of cinnamon/brown sugar.


COFFEE CAKE MUFFINS (From Genesis of a Cook)
Makes 10 standard muffins

Streusel Topping:
1/3 cup packed dark brown sugar
1/3 cup flour
Dash of salt
1/4 tsp ground cinnamon
1/3 stick of room temp butter, cut into small pieces

Muffins:
1/2 stick (1/4 c) butter, slightly softened
1 cup flour
1 tsp baking powder
1/2 tsp baking soda
1/2 cup sour cream
1/2 cup sugar
1 tsp vanilla extract
1 large egg

Preheat oven to 350 F. Grease muffin tins.

Prepare streusel topping: Stir together brown sugar, flour, cinnamon & salt. Cut in butter until mixture forms large coarse crumbs.

In a small bowl, whisk together flour, baking powder & baking soda.

Using a mixer on medium speed, cream butter & sugar. Add egg, beating until well combined. Mix in vanilla & sour cream. Reduce speed to low, and add dry ingredients gradually until just combined.

Divide half of the batter among prepared muffin cups. Top with half of the streusel mixture. Divide the rest of the batter among the cups & top with the remaining streusel. (Make sure the cups are not more than 2/3-3/4 full, or they will ooze over the top of the pan).

Bake for 18 minutes. Cool in pan for 5-7 minutes, then carefully remove from pan. Finish cooling on wire rack.

Friday, February 12, 2010

Vanilla Bean Waffles

I'm on a bit of a vanilla bean kick lately. All of the vanilla beans in my cupboard are just begging to be used! While these waffles were delicious, I could not taste the vanilla bean. Next time, I'll either add a little vanilla in addition to the bean, or add two beans. Even without the strong vanilla flavor I was hoping for, these waffles turned our beautifully. They were my first attempt at a yeast based waffle recipe (requiring some planning as the batter is made the night before), but they were quick to mix up and had a light, airy texture that most pre-made mixes don't have. I hope to someday have a belgian waffle maker - this would be the perfect batter for belgian waffles! One thing to note, the batter will have a very strong smell of yeast - however, you cannot taste it in the finished product.


VANILLA BEAN WAFFLES (from DoughMessTic)
Feeds 2-4

2 cups plus 2 Tbsps flour
1 1/2 tsp yeast
1/2 cup melted butter
2 cups warm milk
2 eggs
1 vanilla bean, cut in half and scraped
2 Tbsp sugar
1/2 tsp salt

The night before:

Combine the warm milk, sugar and yeast in a large mixing bowl. Allow to sit for about 10 minutes.

During the wait, melt the butter and scrape the vanilla bean.

When the 10 minute wait is up, mix in the flour & salt. Whisk the vanilla bean seeds with the 2 eggs, then add to the batter. Mix in the melted butter. Combine, but do not over beat.

Cover batter and refrigerate overnight.

In the morning:

Just before cooking, stir batter to deflate it.

Use cooking spray to prepare your waffle iron. Prepare the waffles according to your manufacturer’s suggestions.

Enjoy! They are wonderful with syrup or strawberries & whipped cream!

Sunday, January 31, 2010

Mini Vanilla Bean Scones

After making some homemade vanilla for my mother-in-law for a Christmas present, I've had some wonderful vanilla beans calling my name from my cupboard. These scones were a great opportunity to use them! The tiny flecks look great in the icing, and they were quick to make and held up well to eat the next morning on the road to skiing.


MINI VANILLA BEAN SCONES

3 cups unbleached flour
1 Tbsp baking powder
1/2 tsp salt
1/3 cup sugar
1 stick butter
2 eggs
1/2 cup cream (they are fluffier with cream than with milk)
1 tsp vanilla extract
1 1/2 vanilla bean, split and scraped

In a medium mixing bowl, mix together the flour, baking powder, salt and sugar. Cut the butter into tablespoon-sized pieces and cut it into the dry ingredients.

In a large bowl, whisk together the eggs, cream, vanilla extract, and vanilla bean seeds. Whisk the dry ingredients into the wet ingredients. Knead the dough, either in the bowl or in on the counter, just until mixed well.

Separate the dough into thirds. Shape each portion of the dough into a circle (approximately 1 inch thick) and then cut each third into sixths. Place scones 1-2 inches apart on a cookie sheet.

Place the pan of scones in the freezer, uncovered, for about 30 minutes. Then, remove the scones from the freezer and put them directly into an oven preheated to 425 degreees.. Bake for 10-12 minutes or until just starting to turn golden brown. (If you cook any longer, the bottoms may burn).

Immediately remove from cookie sheet & place on a cooling rack (placed over parchment or waxed paper). While still warm, spoon vanilla bean glaze over scones, trying to cover all surfaces.

GLAZE:

1/2 vanilla bean, split & scraped
2 tsp vanilla extract
2 cups powdered sugar
milk/cream

Mix all ingredients. Add enough milk/cream to make the glaze the consistency you desire.

Enjoy! I just love the little flecks :)